Measurement Tool
![]() The Measurement Tool allows for measurements directly in the VC Map. Clicking the depicted icon in the toolbox activates the measurement tool. The selection arrow next to the icon opens all available measurement options in the app.
The Measurement Tool allows for measurements directly in the VC Map. Clicking the depicted icon in the toolbox activates the measurement tool. The selection arrow next to the icon opens all available measurement options in the app.

| The measurement tool can be made available in 2D and 3D maps, as well as oblique aerial images and panoramas. The options vary depending on the app configuration and the currently active map in which the measurement tool is used. |
Measurement objects or the coordinates of the measurement objects (point, line, polygon) are projected into the local coordinate system of the application according to the map used (2D, 3D, oblique, panorama), and the measurement value is output according to this coordinate system:
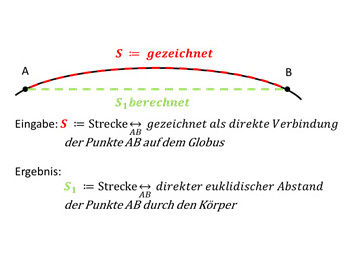
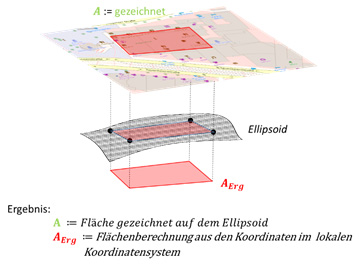
| All options of the measurement tool provide the result as a measurement value based on the local coordinate system of the map, regardless of the global coordinate system used in the viewer. |
Conduct Measurements
The measurement mode is active when the respective measurement option is activated, recognizable by the change of the mouse cursor from the selection arrow to the editing pen ![]() . Clicking on the map starts the measurement or continues a measurement that has already been started. Measurements can be completed by double-clicking at the endpoint. A new measurement is started using the NEW button.
. Clicking on the map starts the measurement or continues a measurement that has already been started. Measurements can be completed by double-clicking at the endpoint. A new measurement is started using the NEW button.
|
|
Select measurements
Individual objects can be selected by clicking on the measurement geometry. Multiple selection is also possible by pressing "Ctrl" on the keyboard.
Subsequently pressing "Del" on the keyboard removes a selected measurement from the view or from My Workspace.
|
Removed objects cannot be restored! |
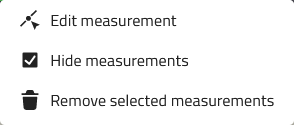
Additionally, individual measurements can be directly edited, shown/hidden, or removed by right-clicking on the corresponding measurement object.
Edit Vertices
The Edit Mode can be acitvated through the following methods:
-
Selecting the measurement geometry and clicking on
 Edit measurement in the tool window
 -
Right-Clicking on the measurement geometry and
Edit measurement via the context menu -
Clicking on
 next to the respective measurement in My Workspace, Edit item and Edit measurement in the tool window
The following actions are possible:
| Action | Description |
|---|---|
Addition of a new vertex |
A new vertex is created by clicking at the appropriate place on the geometry. |
Movement of a vertex in all directions (horizontal / vertical) |
The vertex is moved to the desired location by clicking and dragging with the left mouse button. |
Removal of a vertex |
The vertex is removed by clicking on it while holding “Shift”.+ (Important: the measurement must have been completed beforehand!). |
Measurement Tool in the 2D Map
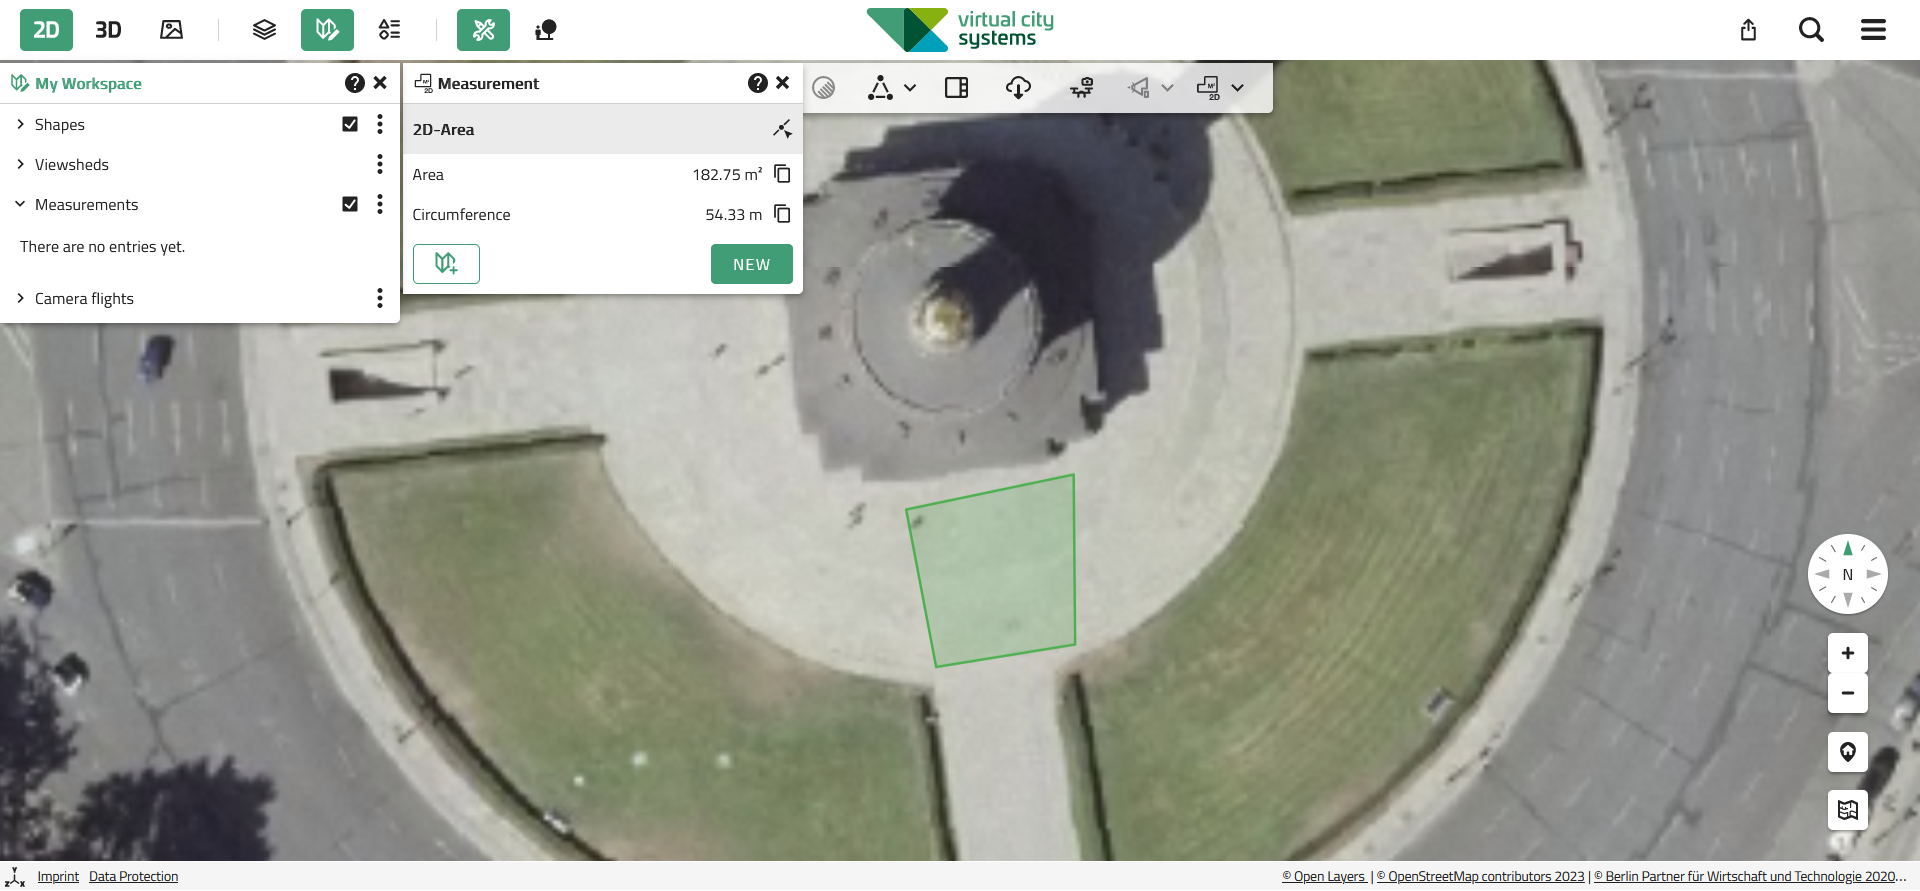
The following measurement tools are available in the 2D map:
Point Measurement
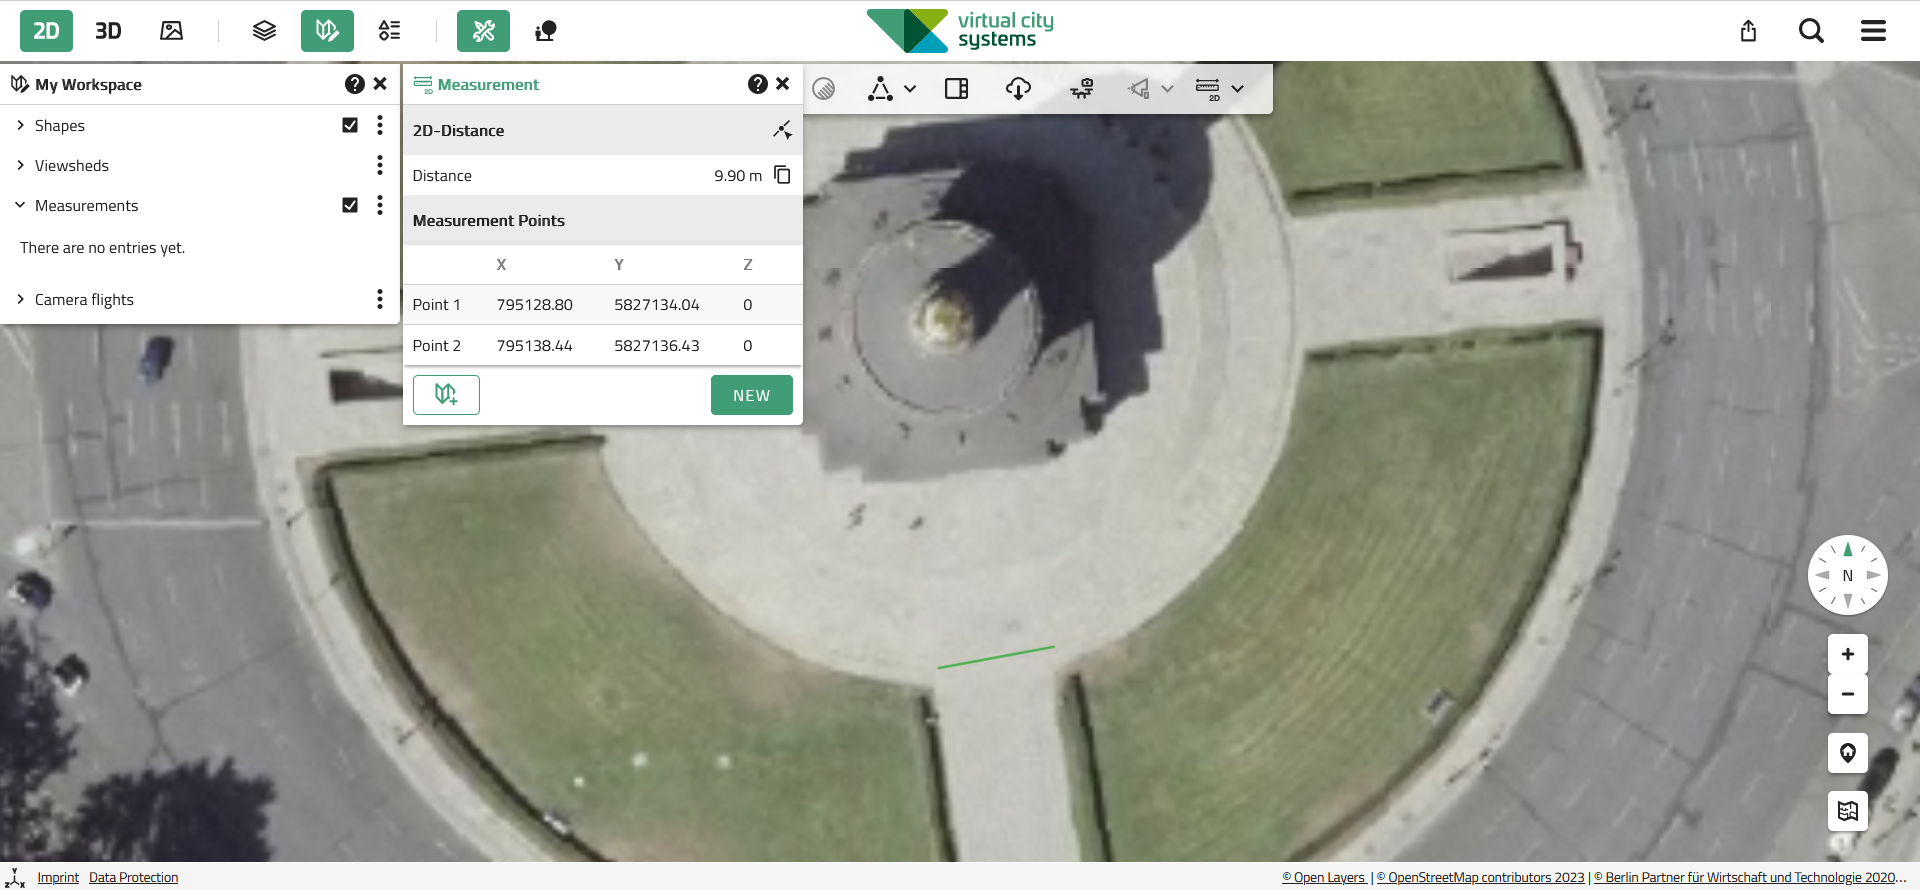
![]() The point measurement carried out in the 2D map outputs the 2D coordinates of the point to be measured in the tool window.
The point measurement carried out in the 2D map outputs the 2D coordinates of the point to be measured in the tool window.
Measurement Tool in the 3D Map
The measurement tool of the 3D map includes the measurement tools of the 2D map and extends them with explicit 3D measurement tools that allow to include 3D objects in the measurement, or direct measurement of these respectively.
|
Using 2D Measurement Tools in the 3D Map The description of the Measurement tool in the 2D map applies, with the note that in the 3D map, the 2D measurements always follow the terrain, but the result is ALWAYS related to the local coordinate system of the application. |
The following measurement tools are available in the 3D map:
3D Point Measurement
![]() The point measurement carried out in the 3D map outputs the 3D coordinates of the point to be measured in the tool window.
The point measurement carried out in the 3D map outputs the 3D coordinates of the point to be measured in the tool window.
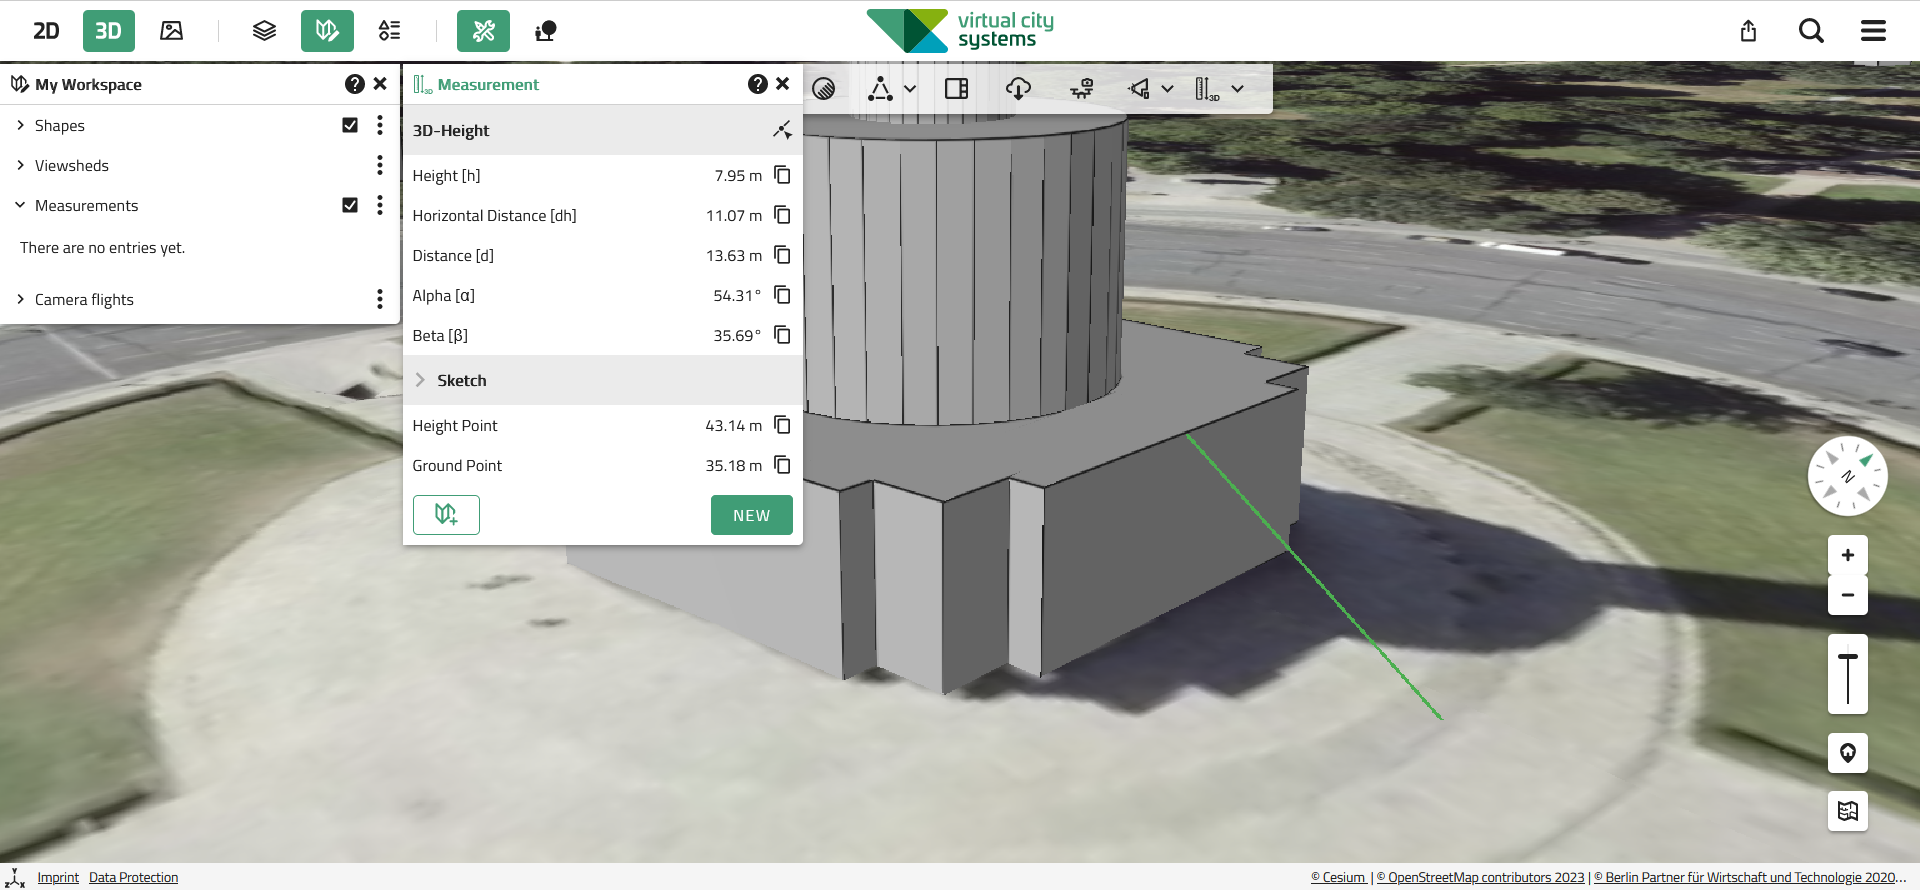
3D Distance Measurement
![]() The 3D distance measurement allows for precise capture of distances that are not only on the terrain, but also take into account three-dimensional structures such as buildings or other 3D objects.
The 3D distance measurement allows for precise capture of distances that are not only on the terrain, but also take into account three-dimensional structures such as buildings or other 3D objects.
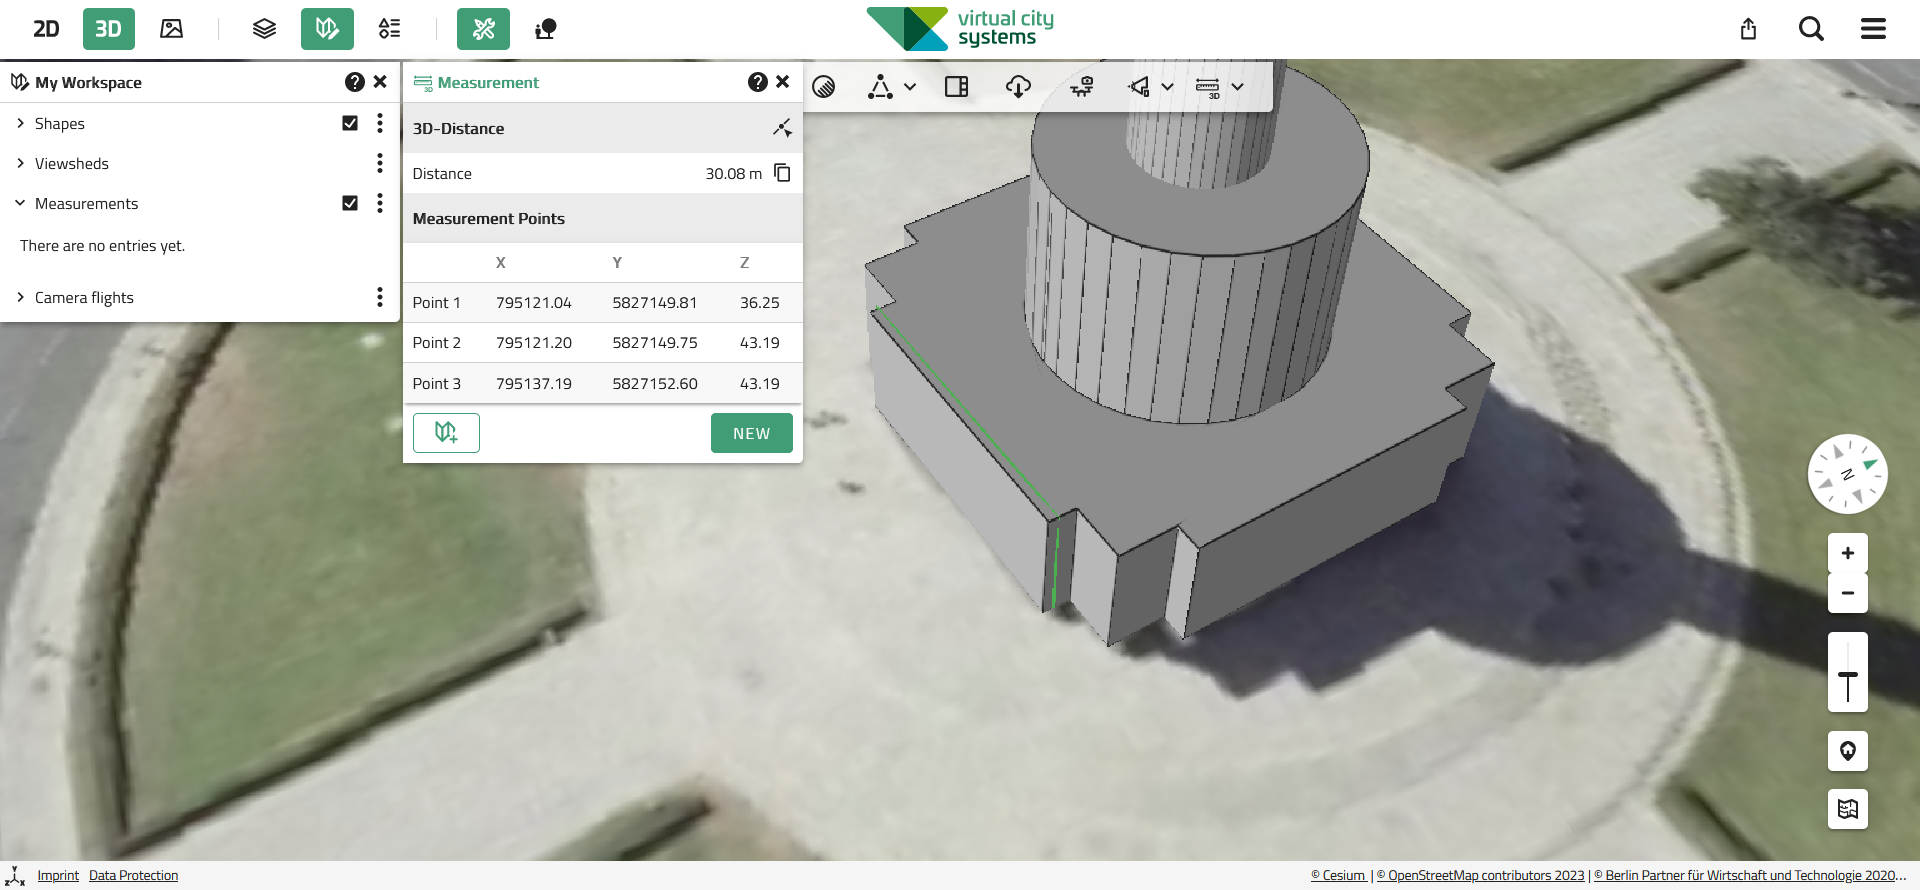
In addition to the respective distance, the 3D coordinates of the vertices are listed in the tool window.
Measurement Tool in the Oblique Map
The measurement tool for the oblique map includes supported measurement tools from the 2D map and expands them to include 2D elevation measurement, which allows elevations to be measured from the 2D image with an tilted acquisition angle.
| Measurements in the oblique map only provide correct results if the individual measuring points are set at ground level. |
The following measurement tools are available in the oblique map:
2D Point Measurement
![]() The description of the 2D Point Measurement in the 2D Map applies.
The description of the 2D Point Measurement in the 2D Map applies.
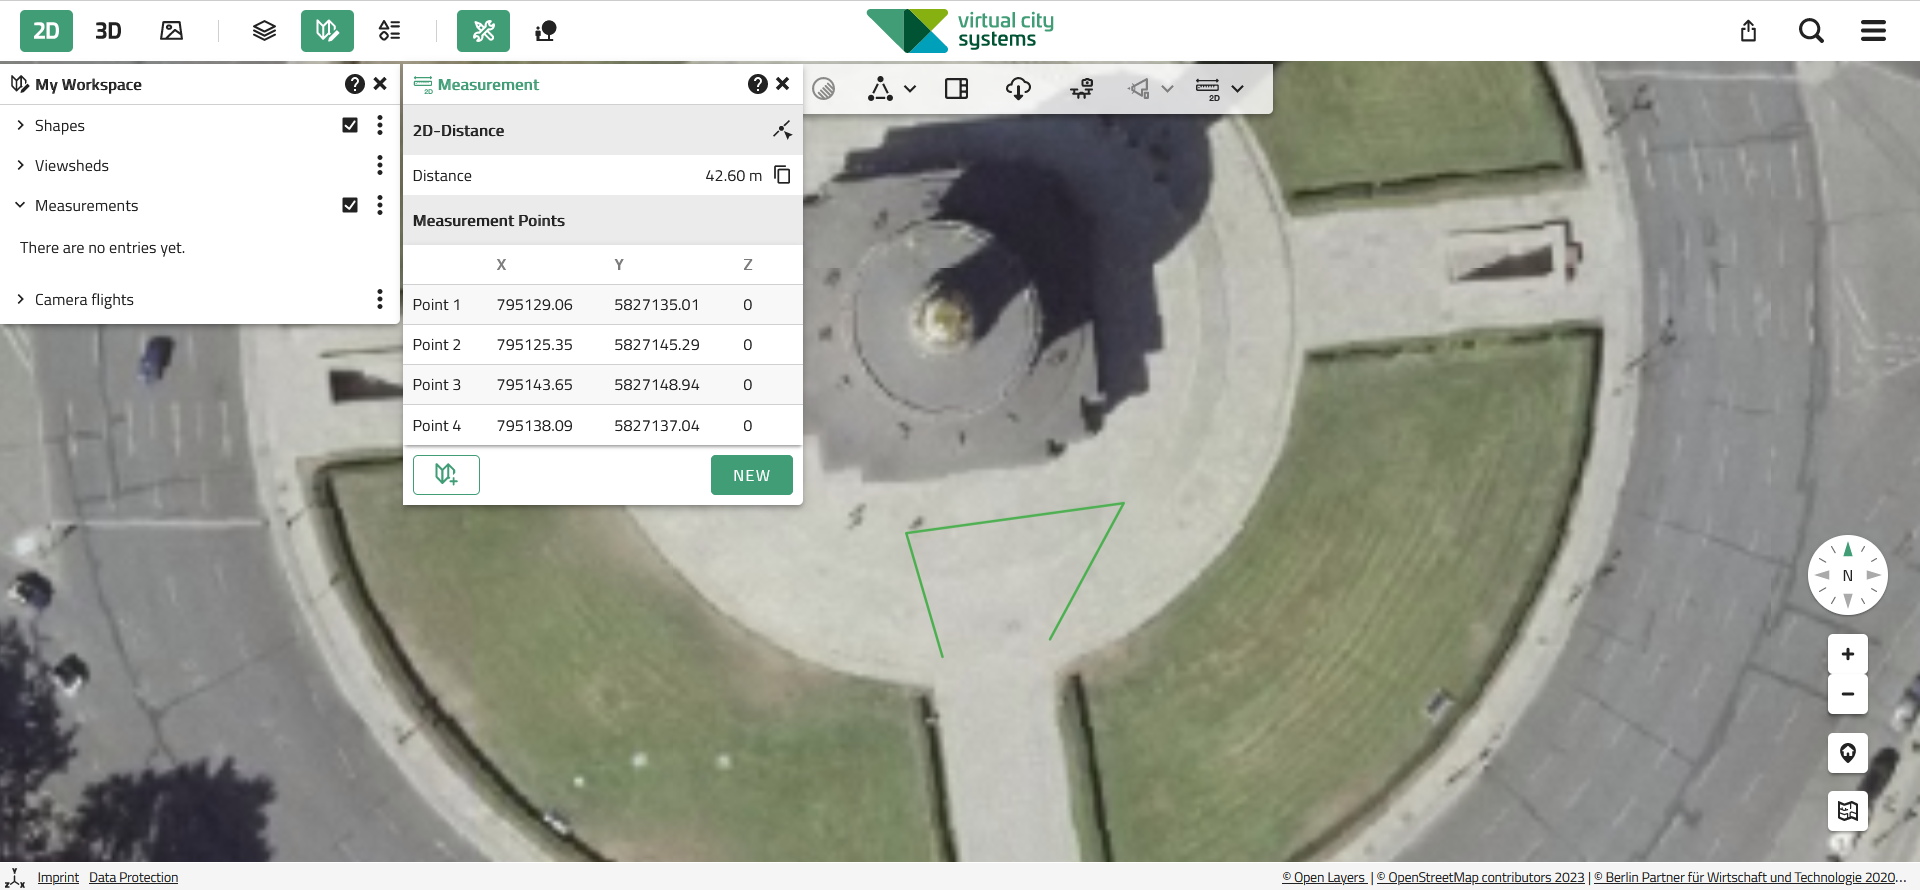
2D Distance Measurement
![]() The description of the 2D Distance Measurement in the 2D Map applies.
The description of the 2D Distance Measurement in the 2D Map applies.
2D Height Measurement
![]() The 2D height measurement in the oblique map allows for the precise measurement of a vertical distance. The first click must be set on the terrain, and the second one vertically above it.
The 2D height measurement in the oblique map allows for the precise measurement of a vertical distance. The first click must be set on the terrain, and the second one vertically above it.
| In the oblique map, a terrain model is required for vertical distance measurement. If this is not available, the given measurements can only be interpreted as estimates. |
Measurement tool in the Panorama Image Map
The measurement tool of the panoramic image map includes all 3D measurement tools. The 3D coordinates of each measured point is derived from the depth image. Depth images are only available if they where calculated based on a mobile mapping compaign that recorded a LiDAR scan in parallel with the image data.
| Depending on the sensors used for data acquisition, not every 360° panorama contains depth image information. If no depth image is available for the current view, the measurement tool is automatically deactivated as long as the panorama map is active. |
The following measurement tools are available in the panorama image map:
3D point measurement
![]() The description of 3D point measurement in the 3D map applies.
The description of 3D point measurement in the 3D map applies.
3D distance measurement
![]() The description of 3D distance measurement in the 3D map applies.
The description of 3D distance measurement in the 3D map applies.
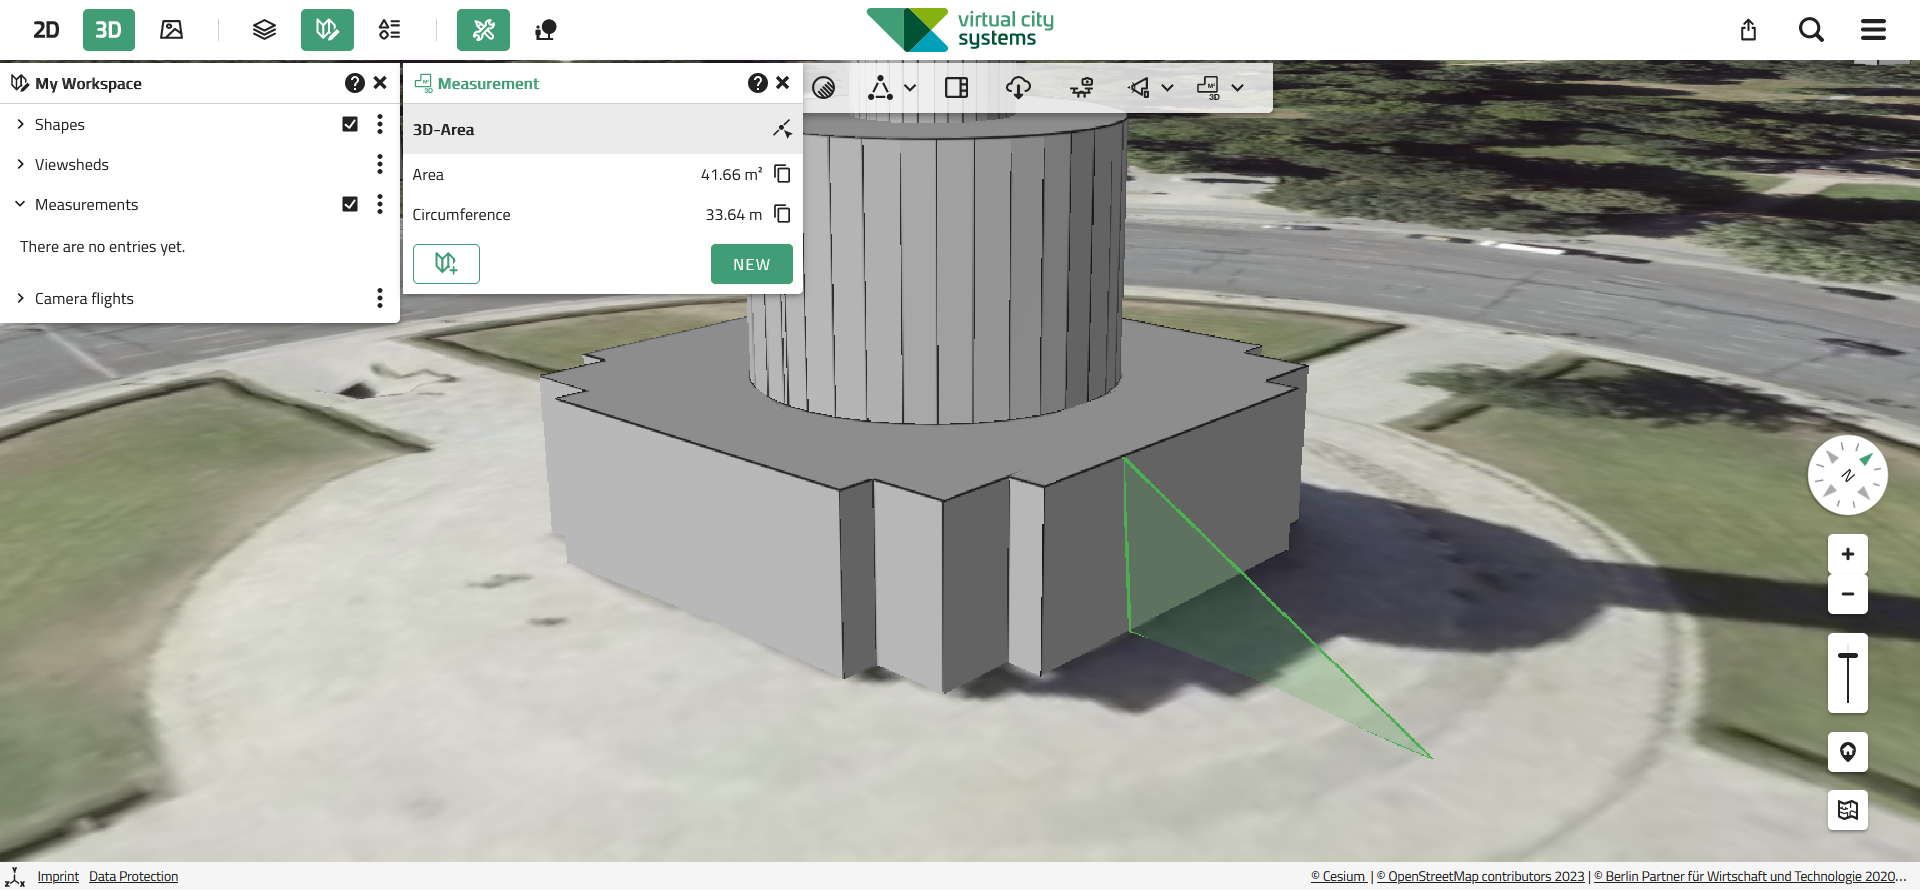
3D area measurement
![]() The description of 3D area measurement in the 3D map applies.
The description of 3D area measurement in the 3D map applies.
3D height measurement
![]() The description of 3D height measurement in the 3D map applies.
The description of 3D height measurement in the 3D map applies.
|
The additional cursor in the panorama image serves as a visual guide to check whether the mouse pointer is pointing to the desired surface and whether sufficient information from the depth image is available at this position to perform a measurement. In addition, the side map visualizes your measurement synchronously, allowing for visual verification. |
Technical notes
| The absolute accuracy of the determined vertex positions of a measurement depends on the distance to the sensor location. The further an object is from the acquisition point, the greater the effect of small angular deviations on the calculated position. This means that even small deviations in image alignment or sensor position can lead to significantly larger errors over long distances. |
For this reason, it is recommended to consider the following points when using the measurement tool in the panorama map:
-
Select a panorama location close to the object: For measurements, select the location of a panorama that is closest to the object in order to increase the accuracy of the absolute position.
-
Use supplementary image data: Due to parallel recording by different sensors, the RGB image (color representation) and the associated image layers of the depth or intensity image (derived from the LiDAR scan) may differ slightly in their position. For more accurate results, it is recommended to display the intensity image during measurements, as it is based on the same data as the depth image.
Interaction with My Workspace
Each measurement added to My Workspace is listed there in the Measurements section.
Using the ![]() menu at the end of each entry, it is possible to
menu at the end of each entry, it is possible to
-
Edit the measurement.
-
Rename the measurement.
-
Zoom to the extent of the measurement.
-
Remove the measurement from My Workspace.