Map View
The map view is where the basic interaction with the map takes place.
It is possible to switch between different map views using the according buttons in the header area of the application: 2D, 3D, and oblique view.
| Please familiarize yourself with the basic user interactions. |
General notes on map navigation
For navigation within the different map views, various input devices or interaction concepts may be used depending on the device (PC, smartphone/tablet). The primary input device for map navigation is usually the mouse or gesture control, supported by the keyboard for certain actions.
The following sections provide specific instructions for using the different input devices for each map view.
Keyboard usage
Keyboard navigation is available in all map views for basic movement in different dimensions (left, right, forward, backward, up, down). Additional actions are available depending on the map view.
Navigation in each dimension is performed by pressing and holding the corresponding key. Movement starts with a slight delay and accelerates to maximum speed. Releasing the key does not stop the movement immediately; instead, it decelerates.
| For keyboard navigation, the map view must be "active." If another window of the application (e.g., content) is currently in focus, keyboard inputs will not be passed to the map. To re-enable keyboard navigation, simply click in the map view. |
2D Map
![]() The 2D map displays two-dimensional content. If the 2D map is activated (indicated by the colored background of the "2D" icon), layers and features that cannot be displayed in 2D are automatically deactivated.
The 2D map displays two-dimensional content. If the 2D map is activated (indicated by the colored background of the "2D" icon), layers and features that cannot be displayed in 2D are automatically deactivated.


3D Map
![]() The 3D map displays three-dimensional content. If the 3D map is activated (indicated by the colored background of the "3D" icon), layers and features that cannot be displayed in 3D - such as oblique aerial images - are automatically deactivated.
The 3D map displays three-dimensional content. If the 3D map is activated (indicated by the colored background of the "3D" icon), layers and features that cannot be displayed in 3D - such as oblique aerial images - are automatically deactivated.
Navigation in the map
| Action | .. Mouse | .. Gesture | .. Keyboard | .. UI |
|---|---|---|---|---|
Move map |
Press left mouse button and drag map |
|
Arrow keys
|
This action is currently not offered in the UI. |
Rotate view |
Hold down the mouse wheel and move the mouse to the right or left at the same time |
|
|

|
Zoom in/out |
Rotate the mouse wheel to zoom in/out of the map view |
|
|

|
Tilt view |
While holding down the mouse wheel, move the mouse up or down at the same time |
|
|

|
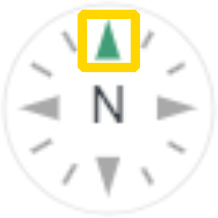
Align north |
This action is not offered as a mouse interaction |
This action is not offered via gesture control |
This action is not offered via keyboard control |
|
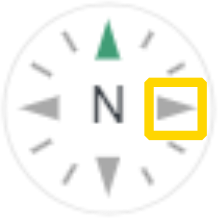
Align east |
This action is not offered as a mouse interaction |
This action is not offered via gesture control |
This action is not offered via keyboard control |
|
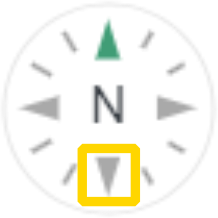
Align south |
This action is not offered as a mouse interaction |
This action is not offered via gesture control |
This action is not offered via keyboard control |
|
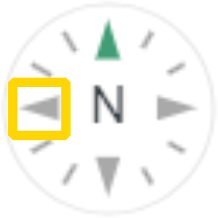
Align west |
This action is not offered as a mouse interaction |
This action is not offered via gesture control |
This action is not offered via keyboard control |
|


Pedestrian mode
![]() The pedestrian mode can be started and ended in the 3D map via the context menu by clicking on a terrain point. If the pedestrian mode settings window is closed, the settings can also be called up again via the context menu.
The pedestrian mode can be started and ended in the 3D map via the context menu by clicking on a terrain point. If the pedestrian mode settings window is closed, the settings can also be called up again via the context menu.
| Option | Description | ..Keyboard / Mouse |
|---|---|---|
Keyboard required |
Forward movement |
|
keyboard required |
Backward movement |
|
keyboard required |
Move left |
|
keyboard required |
Move right |
|
keyboard required |
Increase movement speed |
|
Viewing height |
Camera height above terrain in meters |
only to be controlled via the UI |
Viewing angle |
Expand / reduce angle of view (default value is 60°) |
only to be controlled via the UI |
Azimuth |
Change horizontal viewing direction (0° = N, 90° = E, 180° = S, 270° = W) |
Hold down the left mouse button and drag in the desired direction of movement |
Pitch |
Change viewing direction vertically (default value is 0°) |
Hold down the left mouse button and drag in the desired direction of movement |
| Some functions of the navigation area are not supported in pedestrian mode and are therefore deactivated during use. |
360° Presentation Mode
![]() The 360° presentation mode enables an automatic camera movement in the form of a continuous 360° rotation around a chosen location.
The 360° presentation mode enables an automatic camera movement in the form of a continuous 360° rotation around a chosen location.
To use this mode, align the camera to the desired view and activate the presentation mode via the ![]() button located in the map navigation area (see VC Map Components). The camera will rotate in a circular motion around the selected viewpoint, allowing you to view a specific location or object from all sides. By clicking the button again, the presentation mode will end and the camera movement will stop.
button located in the map navigation area (see VC Map Components). The camera will rotate in a circular motion around the selected viewpoint, allowing you to view a specific location or object from all sides. By clicking the button again, the presentation mode will end and the camera movement will stop.
| All other actions for interactive navigation in the map view are disabled when the presentation mode is active. However, interaction with objects in the map (e.g. selection) is still possible. |
Oblique Map
![]() The oblique aerial image map (indicated by the colored background of the "oblique" icon, if activated) displays the single oblique image matching the current position.
The oblique aerial image map (indicated by the colored background of the "oblique" icon, if activated) displays the single oblique image matching the current position.
As an extension to the single image mode, the oblique-multiview is offered as side map and displays the corresponding oblique aerial images from all four cardinal directions synchronously with the active map view.
Navigation in the map
| Action | .. Mouse | .. Gesture | .. Keyboard | .. UI |
|---|---|---|---|---|
Move one image up |
Press left mouse button and drag image down until the border of the image becomes visible and the new image is loaded |
|
|
Click above the image boundary in the overview map |
Move one image to the right |
Press left mouse button and drag image to the left until the border of the image is visible and the new image is loaded |
|
|
Click to the right of the image boundary in the overview map |
Move one image down |
Press left mouse button and drag image up until the border of the image is visible and the new image is loaded |
|
|
Click below the image boundary in the overview map |
Move one image to the left |
Press left mouse button and drag image to the right until the border of the image is visible and the new image is loaded |
|
|
Click to the left of the image boundary in the overview map |
Zoom in / out |
Turning the mouse wheel zooms in / out of the map view |
|
|
|
Change viewing direction clockwise / counterclockwise |
This action is currently only offered via UI |
This action is not offered via gesture control |
|

|
Align north |
This action is not offered as a mouse interaction |
This action is not offered via gesture control |
This action is not offered via keyboard control |
|
Align east |
This action is not offered as a mouse interaction |
This action is not offered via gesture control |
This action is not offered via keyboard control |
|
Align south |
This action is not offered as a mouse interaction |
This action is not offered via gesture control |
This action is not offered via keyboard control |
|
Align west |
This action is not offered as a mouse interaction |
This action is not offered via gesture control |
This action is not offered via keyboard control |
|


Panorama Map
![]() The Panorama Map supports the display of georeferenced 360° panoramic images. When the panorama map is activated (indicated by the colored background of the “panorama” icon), map layers and functions that cannot be displayed in this map are automatically deactivated.
The Panorama Map supports the display of georeferenced 360° panoramic images. When the panorama map is activated (indicated by the colored background of the “panorama” icon), map layers and functions that cannot be displayed in this map are automatically deactivated.
When this map is activated, the application checks whether there are any 360° panoramas located near the center of the current map view and jumps to the nearest 360° panorama. To do this, at least one map layer containing panorama locations must be active in the application. If no panorama dataset is activated in the map, the panorama map button is temporarily deactivated. If no nearby location can be found, the panorama map displays an empty view with the message “No Image”.
An alternative way to access the panorama map is to click on a panorama location in the current map view. In this case, the panorama map is automatically activated and jumps directly to the panorama view of the selected location.
| The behavior described and the user interface of the panorama map may vary in individual cases if the panorama map is not operated by the panorama viewer developed by VCS but is based on a third-party integration. These are described in the extensions Cyclomedia Panorama Viewer and Inovitas Panorama Viewer. |
Navigation in the map
| Action | .. Mouse | .. Gesture | .. UI |
|---|---|---|---|
Switch to another image |
Left-click on another panorama location in the panorama view or the overview map. |
|
This action is not available via a navigation element in the user interface |
Zoom in/out |
Turn the mouse wheel to zoom in or out of the map view. |
This action is not available via gesture control |
|
Change viewing direction |
Move the mouse up / down / left / right while holding down the left mouse button. |
|
|
Align viewing direction to north |
This action is not available as a mouse interaction |
This action is not available via gesture control |
|
Align view to the east |
This action is not available as a mouse interaction |
This action is not available via gesture control |
|
Align view to the south |
This action is not available as a mouse interaction |
This action is not available via gesture control |
|
Align view to the west |
This action is not available as a mouse interaction |
This action is not available via gesture control |
|

| In addition to the main map, it can be supplemented by a secondary map (with limited functionality). Further information on using the side map is explained under Show side map. |